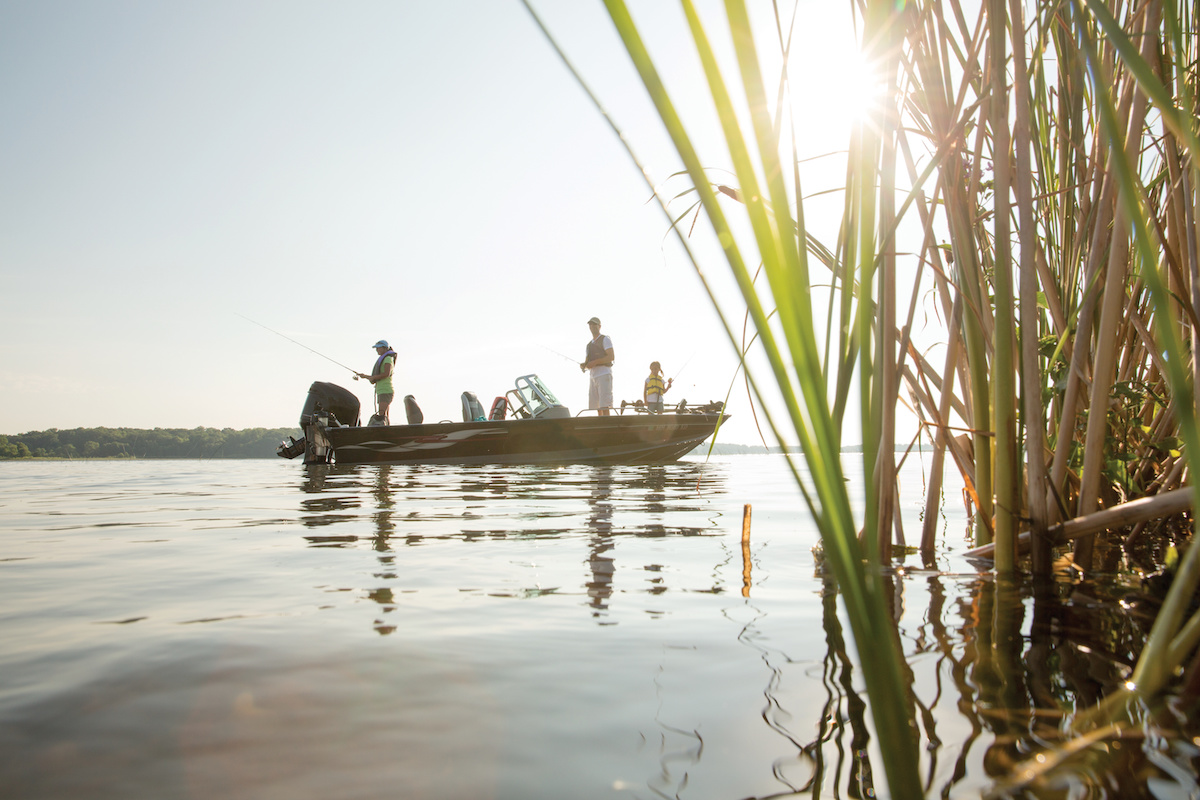
Whether you’re a fan of freshwater fishing or saltwater fishing is your passion, one thing is for sure: knowing how to use a fishfinder will help you catch more fish. The tech in modern fishfinders is way beyond what was available just a few years ago, with 3D imaging, side-scanning, and 360-degree views all in the mix.
Today’s units give you the ability to see mere minnow from dozens of feet away, and to see large fish from hundreds of feet. And even the least expensive, most simplistic fishfinders provide color views and vivid detail of what lays beneath the water’s surface. But to take advantage of these things, you do have to know how to use a fishfinder.
Ready to get started? Here are the basics...
5 Steps for Using a Fishfinder
- Power the unit up.
- Study how to use your individual unit’s user interface.
- Choose the settings most appropriate for the situation, or set the unit on “auto” mode.
- Interpret what you see on the fishfinder screen.
- Catch those fish!
Explore All-Purpose Fishing Boats
1. Turning on a Fishfinder
Powering up the unit is commonly as simple as hitting the “on” button. If your boat’s system has a Multifunction Display (commonly called an MFD) which displays a combination of fishfinder, chartplotter, radar, and/or other electronics, you’ll then want to choose the fishfinder screen from the menu.
2. Learning How to Use a Fishfinder's User Interface
Like most consumer electronics, each individual fishfinder has its own user interface, or menu system, that allows you to operate it. The good news is that most modern units are patterned after cell phone touchscreen interfaces. Years ago it could be quite difficult and very frustrating to figure out how do even simple tasks like zooming in and out, changing the fishfinder’s range, or making the screen brighter or darker. But generally speaking, it’s far easier to figure out how to perform basic tasks today than it was in the past.
That said, there’s always been one way and one way only, to really get a grip on how to use any unit’s menu system—you have to actually use it.
- Reading an instruction manual (or watching a YouTube video) will help you get started, but there’s no substitute for on-the-water experience.
- With very simple units, you’ll probably be able to nail down basic functions in a matter of minutes and have the user interface down pat after a few fishing trips.
- With more complex systems it may take a couple of trips to get used to operating the system and it may be a season of use before you’re comfortable utilizing all the different functions and features.
Will the user interface on your fishfinder be via a touch-screen, or will you be pressing tactile buttons?
Systems of both types are on the market, many units have a combination of both touch-screens and buttons, and touch-screens are available even in mid-level modern marine electronics. We’re all very accustomed to touch-screens and many people favor them these days, but we do have one word of caution in this regard: on small, open boats having buttons can be very important because it’s difficult to accurately manipulate a touch-screen when you’re moving, bouncing, rocking, or rolling.
Additionally, anglers (especially those who fish with bait much of the time) will discover that fish scales and slime easily migrate from the fish, to your fingers, to the touch-screen, and then may interfere with its operation. So for anglers on small boats, a fishfinder that has either buttons or a combination of buttons and a touch-screen offers a more reliable interface.
3. Choosing the Settings
Whenever you have a fishfinder you’re unfamiliar with, it’s best to begin by leaving all the unit’s settings on auto. The automatic mode on modern fishfinders is better than what an unfamiliar user can accomplish in short order, and is effective at establishing baseline performance. After watching the screen for a while, you’ll be better able to ascertain whether you’re improving your view of the underwater world, or degrading it as you make adjustments.
Some of the common functions you may want to adjust at some point include:
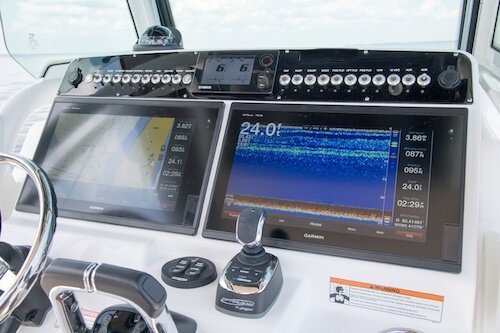
- Sensitivity: As a rule of thumb, increasing sensitivity will show you more fish and possible more detail, but will also increase the amount of “clutter” (false returns and scattered specks and dots) on the screen.
- Range: Auto-range is usually extremely effective on modern down-looking units, but you may want to reduce range to increase the portion of the screen showing water column as opposed to bottom, or (in very deep water) to show broken bottom readings that are too deep and weak for the unit to recognize in auto mode. With units that look out to the sides, you’ll want to increase or decrease range to find a happy medium between how far off you can see, and how much detail is presented on-screen. Screen size is a limiting factor in this case. You may be able to clearly see a small fish as a mark when set to a 50 foot range on a 10-inch screen, but when you range out to display 100 feet on the same screen, that return will be half the size and may appear as a mere speck that gets disregarded as clutter.
- Zoom: Zooming in on specific parts of the water column or on the bottom can be very helpful, as it dedicates a larger portion of the screen to a more concentrated area of water. Using the same example of a small fish 50 feet away, if you zoom in on the 10-foot section of water where that return is, the fish will appear at five times the size.
- Color Pallets: While changing color pallets is mostly just a matter of preference, some people find different pallets better or worse in different lighting conditions.
- Scanning vs. Traditional Views: Many modern units have both high- and low-frequency fish-finding abilities. High frequency views, often called scanners or imagers, can provide spectacular detail in comparison to traditional fishfinder views. However, the signals sent out by scanners deteriorate faster over distance, so they have less range. When depth is measured by dozens of feet as opposed to hundreds of feet most people prefer to set their units on a scanning view. But in deep waters, setting to a traditional fishfinder and its lower frequencies usually works better.
- Screen Brightness: In broad daylight it’s almost always best to keep that screen turned up to maximum brightness. But that can be blinding, when you’re fishing or cruising at night. So in the darkness, consider dimming the screen down. (Some units have pre-dimmed “night modes” you can try, too).
4. Interpreting What You See On-Screen

For most anglers, this is the most difficult part of using a fishfinder. In full auto mode some fishfinders will display fish icons as opposed to raw data, but in truth these aren’t very helpful and only serve to hide some of the information you may be able to glean from looking at the raw returns.
So you’ll be able to use the fishfinder much more effectively if you eliminate those icons and instead look for these key features:
- Color of the return
- Shape of the return
- Size of the return
- Location of the return
Color
On standard color palettes, most fishfinders display “hotter” colors the stronger the return is. So a red return is large and solid, yellow is a bit weaker, green weaker than that, and blue is very weak.
Shape
- Single large fish returns often provide “arches,” which are boomerang-shaped and indicate individual fish.
- Round returns more commonly indicate schools of bait, sometimes called “bait balls”.
- Vertical returns attached to the bottom are sometimes created by hard structure (like a tree, a wreck, or other solid objects). However, always remember that shape can be affected by both boat speed, and whether or not the fish are moving.
- When a boat is static, fish that are under it and aren’t moving would appear more or less as solid horizontal lines rather than arches.
- Thick bait may create a false bottom reading.
- And solid structure sitting on the bottom could appear to be part of the bottom.
Size
As one would expect, larger items look larger on-screen and smaller ones look smaller. However, it’s important to remember that zoom and range settings have a direct correlation. So a fish will look twice as large on-screen when you’ve set the zoom setting to 2X.
Location
Taking a return’s location into account is an important part of making an educated guess as to what you’re seeing. This does require some knowledge about the fish themselves, which can be gained only through experience and/or research.
- If you’re fishing in an area where both black drum and bluefish are found, for example, and you see a return high in the water column, you can surmise that it’s more likely a bluefish because this species may be found anywhere in the water column while drum are commonly found at or close to the bottom.
- If you’re casting in a lake that has crappie and bass and you spot a large school of fish hovering around a deep submerged tree during mid-summer, you can be fairly sure you’re seeing crappie since they tend to congregate in large schools around deep structure in many lakes during the heat of summer.
Judging what you’re seeing by its location is never a sure thing, but it can add another piece of the puzzle as you try to figure out what’s what, looking at the fishfinder screen.
5. Fish On!
Speaking of puzzle pieces: that’s exactly what each of these items amounts to. Put them all together, and you’re beginning to harness the information that fishfinder is giving you in order to make better-educated assessments of what you see on the screen, at any given time. You see a hot red return in the shape of an arch that’s larger and slightly deeper than a big round yellow mark? There’s a good chance you’ve just seen a big predator—maybe the one you’re aching to catch—shadowing a bait ball. You see a red square that’s quite large, sitting on the bottom? You may have just found that wreck you were looking for.
And, you know what happens when that puzzle seems to be complete? It’s time to drop your lines, and catch those fish.
Read Next: The Ultimate Fishing Boat Buyer's Guide
You Might Also Like:

