A personal watercraft (PWC) such as a BRP Sea-Doo, Yamaha WaveRunner or Kawasaki Jet Ski, should be flushed after a day of operation in saltwater, or if it encounters silty or sandy conditions in freshwater.
Flushing saltwater and debris from the engine cooling system and exhaust will help prevent internal corrosion and keep those important cooling passages running clear, so your PWC stays reliable and you keep having fun on the water.
Here’s how to flush the engine, and how to rinse down the engine compartment.
7 Steps for Flushing a Jet Ski, WaveRunner or Sea-Doo
Follow these simple steps to flush the engine on your personal watercraft—but remember, always find and follow the instructions for your model before flushing for the first time.
- Ensure the PWC is horizontal (level) with the ground.
- Locate the flush port—likely on the transom, under the seat or in the engine compartment depending on your model.
- Attach a garden hose to the flush fitting; but do not start the flow of water.
- Start the PWC engine and let it idle, then immediately start the flow of water through the hose.
- Follow your owner's manual, instructing you to idle for 90 seconds to 3 minutes.
- Turn off the flow of water, then shut down the engine.
- Disconnect the water hose and replace the cap over the flush fitting.
And that's it! It’s not a bad idea to use your hose to rinse out the jet drive. Spray water into the inlet in the bottom of the hull and into the jet nozzle on the back of the PWC.
It's important to keep in mind that, starting the water flow before you start the engine could result in that water flowing into the engine combustion chamber through the exhaust. Once you're done flushing, always turn the water off first. Some brands will instruct you to blip the throttle a few times before shutting down the engine to clear water from the exhaust.
Now, let's dive a little deeper into the details...
Explore All Personal Watercraft (PWC) Brands

Follow Your Owner's Manual
We've offered general instructions above, but for flushing instructions specific to your PWC model, you should consult the maintenance section of owner’s manual. If you do not have a copy of the manual, one can often be downloaded for free from the manufacturer’s website, or a dealer can order you a paper copy.
On models with a closed cooling system (most late-model Sea-Doo PWC) you will be flushing only the exhaust. For other PWC you’ll be flushing the exhaust and the engine cooling passages.
Flushing is a simple operation but it is critical that you follow the flushing instructions for your PWC exactly as they are spelled out in the manual. Failure to follow the instructions could result in water getting into the engine, which can lead to expensive repairs.
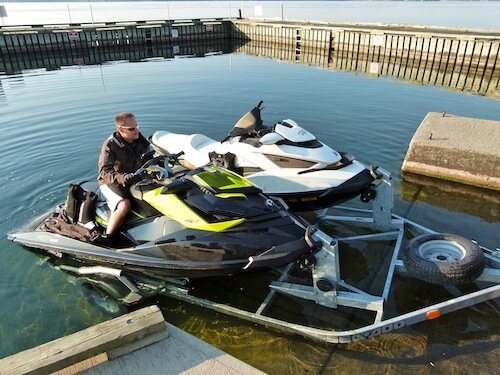
You can flush the PWC while it is on a trailer, a storage rack or on a lift, but it must be out of the water.
Locating the Flush Port
On some models, the flush port is on the transom (the back of the hull), while on others it will be under the seat or in the engine compartment.
Again, check your owner’s manual for the location. Some flush ports are designed to accept the male end of a garden hose. Others use a snap-in adaptor that screws onto the garden hose. The adaptor was supplied with the PWC when it was new. If you don’t have the adaptor and it’s required for your model you can get one from a dealer.
Rinsing Your Engine Bay
When used in saltwater a salty mist can enter the engine compartment through the ventilation system. This salty mist can cause corrosion on the throttle linkage, electrical connections and other components, so you want to rinse it off.
- Remove the seat sections and lift off any covers under the seat so you can see the engine—check your owner’s manual if you are not sure how to do this.
- Wait for the PWC engine to cool down. Never rinse a hot engine.
- Remove the bilge plug from the lower back of the hull, so that the rinse water can drain out. If possible angle the bow of the PWC up a little to encourage the water to drain from the bilge.
- Using your water hose simply rise the engine area and the bilge with fresh water. It’s OK to use your thumb to make a spray of water, but don’t use a nozzle that makes a lot of pressure and NEVER USE A PRESSURE WASHER. Too much pressure can force water past seals on electrical connectors and other places you don’t want it to go.
- Use an old towel or rags to wipe off water from surfaces you can reach.
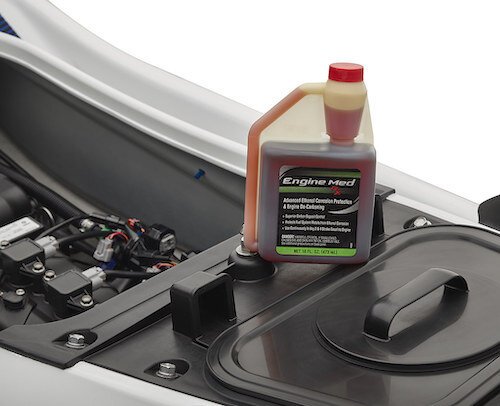
- Spray down the engine components with a water-displacing lubricant (many PWC manufacturers offer these specialized products) or WD-40. This will displace any water left behind and leave behind a thin anti-corrosive film.
Store the PWC with the seat off to let the engine compartment dry completely. You can leave it angled bow-up to facilitate draining, but don’t forget to replace the bilge plug before using the craft again. Leave yourself a reminder, like a Post-It note on the handlebar, so you don’t forget.
Read Next: Personal Watercraft (PWC) Safety Guide
You May Also Like: