| You donât have to reinvent the wheel â just look for ways to do a better job in an easy, more efficient manner... |
| Jul 24, 2009 |
| By Karl Anderson |
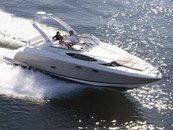
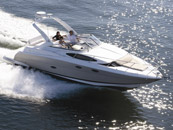
Just as in any manufacturing or production business, our crew always looks for ways to improve our efficiency and reduce the effort needed to get the best possible results for the job. Throughout the years, Iâve seen many good ideas implemented on different boatbuilding projects or newly acquired boats. In this case, Iâm not talking about electronics or fancy equipment; Iâm talking about the innovative setups and little rigging tips that can make the jobs of the captains and deckhands easier and more efficient. My longtime crewmen Tim Mitchell, Ben Brownlee and I do not tolerate clutter and mess. In other words, we like things to stay organized to ensure we are prepared at all times.
Tidy Up
I believe that a clean boat is a happy boat â sparkling, organized and with everything in its place. A boat shouldnât be cluttered with clothing, shoes, towels, tackle, rigs or any other gear. A messy workspace hinders your ability to react quickly and safely to a situation if the ship hits the fan. At some point, if you are putting hours in on the water, something will happen where youâll need quick, clean access to the problem and/or potential solution, be it tools, equipment to stop a leak, firefighting equipment, medical gear or even the ability to take advantage of a hot bite. The ability to access all of your tools is key to keeping the boat in top operating condition in an emergency and your crew and guests safe from harm. Even just properly storing your daily cleaning gear and tackle helps alleviate possible problems.
To store all of our extension handles, chamois mops, cleaning heads, brushes, teak pads, cutting boards and other gear, we adopted a good system that Iâve seen used on other rigs in the past. Using some PVC pipe and fittings, we built a rack that hangs under the gunwale and keeps our handles and other gear securely in place. All of the pieces and heads fit on the rack as well, so you donât spend any time searching in the gutter or the back of a stuffed locker for the right brush head. This also helps keep everything from sliding around and scratching the gutters as we travel. We also mounted our cutting board and rigging station to the inside of the locker door, utilizing a virtually dead space.
And since our engine-room exhaust fans blow through the lockers, when we put everything away after a washdown the heat dries our chamois mops so they donât mold and rot.
One of the problems that comes with a mezzanine-deck cockpit is the lack of a proper rigging area. After looking at mezzanine boats for a long time, the old deckhand in me just couldnât stand the thought of having to rig baits bent over a cooler or on a tiny sliver carved out of a rocket launcher. Especially since every time you rinse off the station or cooler, you get rigging mung all over the deck. And the "tackle" drawers underneath the back of the launcher soon turn into an unorganized catchall that stays wet â a terrible setup that does nothing but create more work.
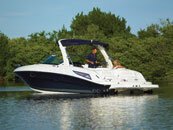
Our 58-footer came with the old-school setup and a pair of nice, flat bulkhead freezers, but our new 72-footer sports a mezzanine, and it bothered me that we didnât have a dedicated station for rigging. So I turned to Jack Hopewell, our tower builder, to fabricate a multipurpose station that fits in the 90-degree rod holders in the forward part of our covering boards that we use to stow our rods when fighting a fish. Hopewell mounted a gooseneck with a swivel to a gimbaled support that fits into the rod holder and allows the table to spin. This provides a convenient workstation thatâs close to the tool drawers when rigging baits and lures or making hook-sets. And since you can spin the table out over the covering board, it creates a great space for cleaning fish or cutting chunks when chumming or bottomfishing. Hopewell even put a hole in the corner of the tabletop fitted with a shower drain and a hose that hangs over the side, so any blood or mung simply runs overboard when rinsed.
Another thing that always worked me up when I was a deckhand were outrigger halyards that didnât work properly. I would get incredibly frustrated whenever our halyards would get crossed in the eyes and start pinching. It made it hard to run up the halyard and was just an inconsistent and inefficient operation. Unfortunately, when I was freelancing, I often got on a boat for just a day or weekâs worth of fishing and didnât have time to fix the setup properly. When I got the chance to rig the outriggers myself, I continually adapted and looked for ways to make them more efficient and also to give us the ability to use more halyards without pinching the eyes on the outrigger poles. I wanted more control to get the most consistent tension for the bite as well.
We started by adopting a method I saw when working for Wink Doerzbacher. He had fastened glass eyes with waxed line to the metal eyes of the rigger. This did two things:
1. It gave each halyard its own eye to run through; and
2. it allowed the mono halyards to glide easily up or down over a larger, smooth surface that wouldnât chafe the mono over time.
We never use anything but mono for halyard material because it glides effortlessly through the eyes, doesnât get as dirty, stiff and coarse as woven nylon cord, and is far easier to rig with crimps for a cleaner look.
Since I like to fish three halyards, plus our two teaser lines on each rigger, we needed more eyes. So Mitchell and I brainstormed and he came up with a great idea. We got longtime Merritt rigger Jim Schwartz to weld stainless-steel rings to the single ring that comes with the Rupp Rigger. The result, which looks like a four-finger pair of brass knuckles, easily accommodates the number of lines running up the rigger. He welded two rings to the next stop to make a triple as we spaced our halyards; however, we kept our glass eye at the top to provide a larger, smooth surface at this critical juncture. We also added rings via a clamp on a custom fabricated sleeve since the standard eyes didnât give us the desired spacing and spread for the halyards. And following a setup from Capt. Bobby Brown, we dropped our long-rigger halyard down a bit from the tip of the rigger to the heftier section of the pole so we could tow bigger baits from the long-rigger position without bending a rigger tip. If youâre pulling from the tip and a big girl eats on an inside turn, youâre in a prime spot to bend the rigger.
Itâs easy to sit back and use what youâre given, but if we all did that, weâd still be driving Model As and winding our watches. You donât have to reinvent the wheel â just look for ways to do a better job in an easy, more efficient manner. A crusty old skipper once told me, "Donât work hard; work smart." And Iâm all for that.
Â
Shared with Permission by Marlin.