The increased use of cell phones has decreased use of VHF radios by boaters who don’t venture too far offshore. But for those who like to do some long-range cruising, a VHF radio is a necessity. If you run into an emergency, you don’t want to take the chance that you might not get a cell phone signal. If you ever do run into trouble, your chances of a timely response from the authorities are higher when using a VHF radio.
STEP 1
When installing any type of electronic equipment aboard your boat, it’s always best to find a location that will be relatively dry. Most VHF radios are waterproof but will last longer if protected from spray and splash. Once you have chosen the best location, position the radio (with bracket, microphone, power cord, antenna, and auxiliary cables) into the selected location to assure there’s no interference with anything surrounding the radio. With everything in place, mark the location of the mounting bracket with a pencil. Remove the bracket from the radio and use it as a template to mark the holes to be drilled for the mounting hardware. Drill the holes and mount the bracket with the supplied stainless-steel nuts, bolts, and lock washers.
STEP 2
This step may or may not be necessary, depending upon the level of engine noise produced by your boat. Interference from the noise generated by the electrical systems of engines is sometimes a problem with radios. The radio used for this installation is designed to be essentially impervious to ignition and alternator noise. However, it may be necessary to take measures to further reduce the effect of noise interference. The VHF radio DC battery wires, antenna lead, and accessory cables should be routed away from the engine and engine compartment, and from any power cabling carrying high currents. In severe cases of noise interference, it may be necessary to install a noise suppression kit, which can be purchased from most marine supply companies, including West Marine.
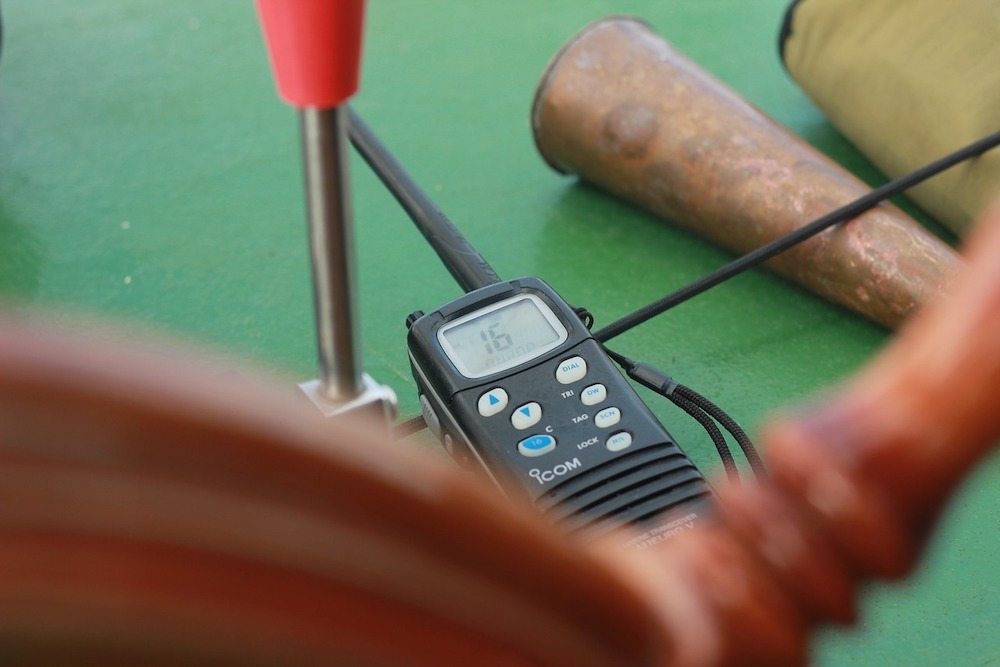
STEP 3
The supplied DC power cord has two wires — black and red. Connect the red wire to the positive side of your distribution circuit or battery. Connect the black wire to the negative side of the distribution circuit or battery. Keep the battery leads short. Direct connection to the battery is best. If a direct connection cannot be made with the supplied power lead, then any extension should be made with #12-14 AWG wire. Long extensions (avoid) require the use of larger gauge wire. The power cord is equipped with a fuse to protect the radio. Use only a six-amp fast-blow fuse for replacement. Connect the power cord to the keyed connector on the power “pigtail.” Connect the antenna and any other accessories. Install the radio in the mounting bracket and connect all cables and accessories to the appropriate jacks and connectors on the back of the radio.
STEP 4
The installation of the antenna is separate from the radio. It’s recommended that an 8-foot, 6-decibel rated antenna be used for most powerboats. The type of antenna used for this installation is a Shakespeare Style 4187 stainless-steel ratchet mount. After choosing the best (and highest) location, away from electrical equipment, use the bracket as a template to mark the holes. Once the holes are drilled, feed the coaxial antenna cable through the hole in the bracket and screw the antenna onto the bracket. Using the stainless-steel hardware, mount and secure the bracket/antenna combo.
Route the coaxial cable to the VHF radio’s back, attach the supplied connector to the cable, and plug it in. Any excess cable should be rolled in a coil of at least 8-inch diameter and stowed in an out-of-the-way place, away from other electrical cabling. You can shorten the cables, but no less than 3 feet in length.
By Steve Noury