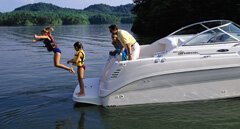
Most boat owners would agree there’s nothing like anchoring out in a quiet cove or enjoying a raft-up with friends on a summer afternoon. A swim platform can certainly update the look of your boat, while adding to the safety and enjoyment of your boating experience. It will give you the extra room you need to sit, lay, slip on your skis, or just take a dip. And a swim platform is invaluable when it comes to boarding your boat.
Step 1: You’ll need two people for the job. Inspect the bilge area for objects. The platform can rest on top of the stern eyes. Shim it up slightly. The platform top should be below the radius area, below the rub rail. Center it from side to side. The platform should be parallel with the waterline, with a 1/4-inch downward taper to the aft. Use a level on the hull’s side, with the scum line, matching it to the platform. If the boat’s clean, use the factory platform as a reference. Support the platform with a 2x4 at the aft end. Use a rope from the trailer to the cleats to hold it toward the transom. Shim away from the hull about 1/8-inch. Pull down the rubber trim while fitting the platform, then trim to fit, once the platform is secured. Supplied with this platform are four metal angle brackets and one plastic bracket. The metal brackets are for securing the outboard portions. The plastic bracket secures the center section. The brackets aren’t pre-installed, due to their need to be flush on the hull, prior to the platform installation.
Step 2: With the swim platform level across the hull, and centered, you can then place the metal brackets on the hull for marking. The outboard brackets should be a couple inches inward from the stern eyes. The two others will be placed on the same larger flat area, toward the outdrive. The plastic fills the center, above the outdrive. Space as needed. The metal bracket has two holes for the hull, and three for the platform. Should the bracket not fit flush on the hull and platform, you can slightly bend it as needed. Place the metal brackets as noted, and mark the holes on the hull. Remove the swim platform, and drill as needed, using a 1/4-inch bit. Place the plastic reinforcement blocks over the holes inside. The reinforcement blocks should be flat on the hull surface. Then mark from the outside, remove and drill the 1/4-inch as needed. Through bolt the metal brackets, caulking the bolts, circling around the holes prior to placing on the hull, and then caulk the surface of the plastic blocks.
Step 3: Place the platform on top of the brackets and center,shim. Use the 2x4s as needed. The aft hole on the bracket will be through bolted. Mark and drill. Remove the platform if you need space. Countersink the top of the platform for the Allen head socket machine screw. Use the screw to check the countersink depth. Drill a few shallow times, while checking for a flush fit. Caulk the bolts and around the holes, and install the platform with four bolts. Use anti-seize compound on the threads, to prevent seizing. Place the plastic support in the center area. Hold flush to the platform. A slight gap will be present on the hull. Three bolts for the platform are recommended, and four to the hull. The small plastic blocks are placed inside the hull.
Space and mark as needed. The hull bolts will be placed where the plastic angle support makes contact with the hull. A gap will be present above it. Drill the plastic as needed. Hold it up to the hull, drill while in place. Put a bolt through the hole to hold. Drill from the underside, and countersink from the top side as needed. Clean the drill shavings, caulk around each hole, and the plastic support. Caulk the bolts and plastic-backing blocks, and secure.
Step 4: Secure the down rod supports. The shorter support is placed under the ladder-well area in the reinforced block/raised area. Adjust ends to fit the transom and platform flush. The down rod support end should be a couple of inches above the hull end. Make the rod “straight” up and down, mark the transom and drill as needed. Use a 5/32-inch bit and countersink the gel coat. Caulk the holes, the backside of the support tubes, and the 1 1/4-inch hex lag screws, and secure. Don’t over torque, and use caution while securing; if too tight, re-drill. Place the other end up to the platform. Drill the hole (farthest from the end) upward into the ladder well, with a 1/4-inch bit. Countersink from the top. Repeat prior caulking step, and secure. Drill the other hole (only 1/2-inch deep), caulk the hole and the 1/2-inch Phillips head screw, and secure. Measure the other side for the same spacing and distance, and repeat to secure that down rod. Trim the rubber molding, and secure. Once the first hole is drilled, and progress begins, it’s not too difficult. Variances can be made to help as needed.
Story by Steve Noury


