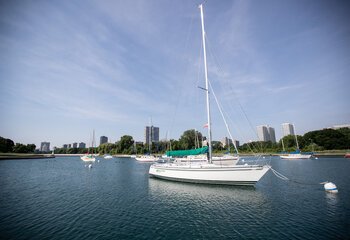
Winterizing Your Boat: Step-by-Step Guide
In many areas of the country, you’ll want to winterize a boat before freezing temperatures set in. Deciding on an option for boat storage is only the first step in preparing your pride and joy for its winter slumber. Even if you use your boat all winter long—a practice we most certainly endorse—there are some systems and items aboard that need some extra attention.

How to Winterize a Boat
- Start by prepping your engine; ensure all water has been drained and removed.
- Apply corrosion protection to your engine.
- Consult your owner's manual for specific instructions, and complete fogging, if needed.
- Add a fuel-stabilizing additive to your fuel system; then run the engine.
- Change your engine’s fuel filters and any fuel/water separators in the system.
- Drain your boat's freshwater plumbing systems (sinks, tanks, and heads).
- Add antifreeze to your plumbing systems.
- Ensure water is removed from all additional systems (raw water washdowns, livewells, bilge pump, etc.).
- Remove drain plugs.
- Cover your boat or place it into winter storage.
Ironically, it’s water that poses the most danger to your boat during the off-season. Freeze-damage is the biggest potential problem, but water in and on your boat can also promote winter-time mold and mildew growth, and corrosion. So as you consider all of these tasks, remember that your main goal is to keep out water and moisture to the greatest extent possible.
Be sure to concentrate on these systems during the winterization process:
- The engine
- Fuel systems
- Plumbing systems
- All other systems that can hold water
Winterization Guide - Specific Engine Types & Other Systems
Outboard engines are designed to drain all the water from their cooling systems completely, when tilted in the down position. So lesson number-one is to tilt the engine down all the way, and leave it there. Covering it is a good idea, but make sure there’s enough ventilation that condensation doesn’t form.
- Aside from eliminating H2O from the equation, you’ll want to give the engine’s internals some protection from corrosion as it sits.
- Historically, with carbureted outboards and old-tech two-strokes this meant running fogging oil through the engine. Most modern outboards, however, are “fogged” via a much easier process.
- Some manufacturers offer products that can be mixed into a remote fuel can of gasoline, and run through the engine to give it a layer of protection. And some other modern outboards control the process electronically—you simply navigate to a “winterize” mode in the control system, and press the button.
- Each manufacturer’s method is a bit different (and sometimes different models in their line require different steps) so this is the time to consult your owner’s manual.
Many people feel that the very best way to winterize an outboard is simply to use it, and they have a point. It’s not low temperatures that cause issues with outboards, but long periods of inaction. If you live in an area where you can run the engine every few weeks (long enough to allow it to reach normal operating temperature), additional winterization steps usually aren’t necessary.
One final tip: now’s the best time to change your lower unit and/or powerhead oil, visually inspect it to be sure there hasn’t been any water intrusion, and put the boat to bed with fresh fluids for the winter.
Stern drives can be a bit more complex than outboards to winterize because you have to worry about getting water out of the engine’s block as well as the drive unit, and may need to run antifreeze through the drive and engine. Again, there are differences between the different makes and models so you’ll want to consult your owner’s manual.
- In most cases you’ll also need to remove block plugs (which allows water to drain from the engine and also helps remove sediments and scale that can gather inside).
- On top of that, you’ll want to make a thorough inspection of exposed hoses, clamps, the bellows, and other parts that may show wear after a long season of use.
- Stern drives will also need that fogging treatment. And remember to bring the engine up to operating temperature before fogging it, to “cook” out any moisture that may remain in the engine.
- What about those ever-important oil changes? Yes, this is the time to take that step with a stern drive, too.
Inboards require a treatment similar to that of stern-drives, though you can eliminate the drive system from the equation. The engine can be drained by opening petcocks or removing plugs, or you can run antifreeze through the system (which is usually the preferred method).
- In some cases, however, inboard boats remain in the water for the winter. In this case, in order to run antifreeze through the system you’ll need to close the intake seacock and remove the intake hose from it.
- Then you’ll want to submerge the end of the hose in a bucket of (environmentally safe) antifreeze and run the engine until the antifreeze comes out the exhaust ports.
- Be sure to bring the engine up to operating temperature before running antifreeze through, because otherwise the thermostat will block the flow to some cooling passages until the engine is up to operating temperature.
- As with other engines: inboards also need a dose of fogging before a winter lay-up, this is the ideal time for an oil change, and a visual inspection should be made to identify any pieces or parts that may be in need to replacement.
No matter what sort of boat you have, all gasoline fuel systems will need some individual attention.
- First and most important: dose the fuel tanks with a quality fuel-stabilizing additive.
- Winterizing with ethanol blended fuel in your tanks can be disastrous otherwise, as the fuel can undergo phase separation. Long story short, when you go to fire up your boat next spring, it will have water-saturated fuel and you’ll have big problems.
- After putting in the additive, make sure to run the engines so treated fuel makes its way through the entire system.
With ethanol woes (hopefully) put to rest, you’ll also need to change your engine’s fuel filters and any fuel/water separators in the system. The key word here is “change.” Sometimes people remove the fuel/water separator, invert it to pour the water out, and then re-use it. This is a big mistake—water and debris can get into the wrong side of the filter when you pour it out and then get drawn into the system, and damage to the filter’s internal components can occur. So always replace the canister entirely.
With the power system taken care of, many boat owners will now need to turn their attention to plumbing systems.
- Any freshwater system, including sinks, tanks, and heads need to be completely drained and then have non-toxic antifreeze run through.
- In most cases this means opening all faucets and allowing them to run until the freshwater tank is dry. Then close them back up, and add the antifreeze to the tank.
- Next, open the faucet physically farthest from the tank, wait for antifreeze to come out, then close it up again. Go to the next-farthest one and repeat the process, until all have antifreeze coming through.
If your boat has a hot water heater, be sure to run both hot and cold faucets to make sure antifreeze has worked its way through the heater, too. In some cases, you may be able to bypass the hot water heater and drain it separately.
You’ll also want to pump out holding tanks and pump antifreeze through the head(s) on your boat. And if your boat has a portable MSD, be sure to remove and empty it—forget about this step, and you could have a very smelly surprise waiting for you next spring!
Remember that any piece, part, or pump that holds water also needs to be drained down for the winter. Be sure to run things like raw water washdowns and livewell pumps until they’re dry. If you still hear gurgling and you know there’s water that can’t be drained out, give them a dose of antifreeze, too.
Finally, don’t forget about your boat’s bilges. Drain plugs should be removed (assuming the boat’s on dry land, of course), and you should take a peek belowdecks to make sure the boat’s positioned to drain properly and thoroughly. Now, you’re ready to cover the boat… and start looking forward to the day when you can prepare for the spring boating season and get back out there on the water.
- Pressure wash hull, clean barnacles off props and shafts, rudders, struts and trim tabs.
- Clean all thru-hulls and strainers.
- Open seacocks to allow any water to drain.
- Check the hull for blisters and if you find any that should be attended make a note to tell your service manager.
- Now is a great time to give the hull a good wax job.
- Be sure the batteries are fully charged and switches are turned off.
- Close all seacocks and check rudder shafts and stuffing boxes for leaks, tighten or repack as necessary.
- Check your battery to make sure it is fully charged, clean terminals, add water if necessary and make sure your charging system is working.
- Check bilge pumps to ensure they are working and that float switches properly activate the pumps and that they are not hindered by debris.
- Monitor your boat regularly to avoid leaks, or animal infestations.
- If your mooring area is likely to freeze be sure to suspend water agitators below it to bring warmer water to the surface so its not iced in.
By following some of the above suggestions, and suggestions given from the links provided, you should be in good shape for the winter. Do not, however, neglect to consult your owner's manuals for manufacturer's recommendations on winterizing your boat and other systems. If you have not done a winterization job before, or don't have an experienced friend to rely on, seek out a professional to do the job for you.
Latest Wave of Boating News & Resources
Inspirational stories, how-to articles, and expert tips for new & experienced boaters